
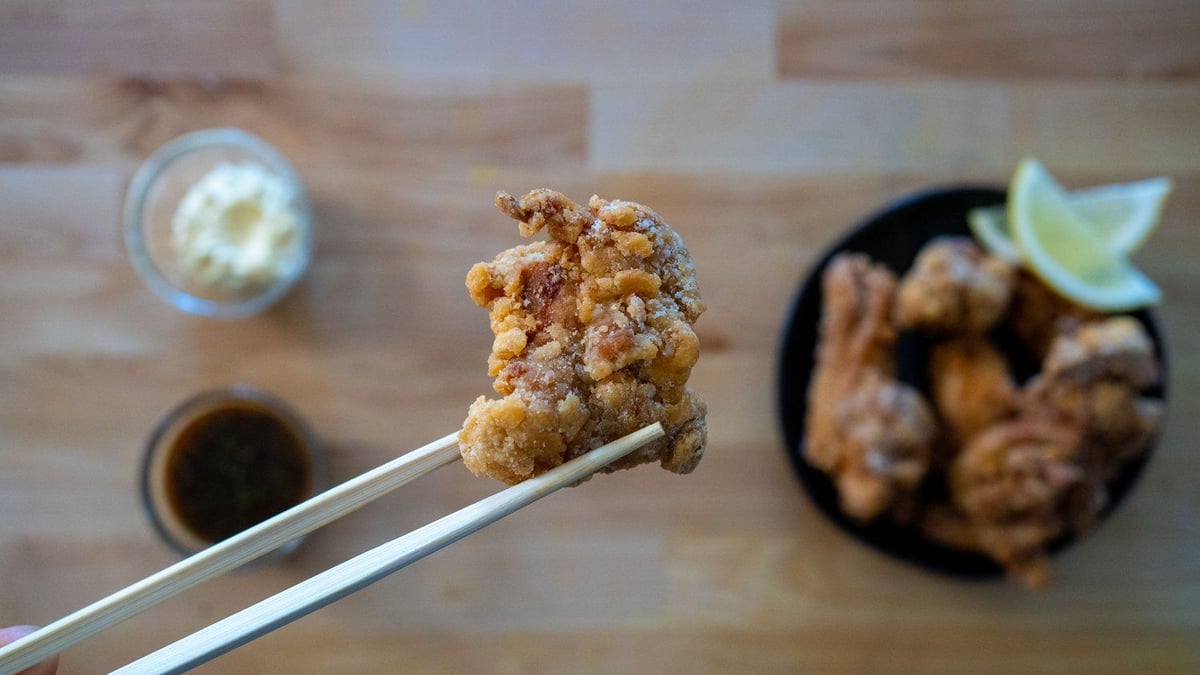
Karaage: Japanese Fried Chicken
The crispiest chicken bites.
 Ethan Chlebowski
Ingredients
Marinated chicken
- Chicken Thighs, boneless6900 g / 2 lb
- Garlic, grated3 cloves
- Fresh ginger, grated1” knob
- Eggs, beaten1
- Potato starch20 g
- Sake30 g
- Soy Sauce15 g
- Sugar10 g
- Salt10 g
Breading
- Potato starch150 g5 parts
- Flour30 g1 part
- Neutral oilfor frying
Dipping sauce & toppings
- Soy Sauce50 g3 parts
- Rice Vinegar30 g2 parts
- Mirin15 g1 part
- Sugar15 g1 part
- Sriracha15 g1 part
- Sesame Oil5 ga splash
- Fresh ginger, grated1” knob
- Scallions, thinly sliceda handful
- Lemons, slicedfor serving
- Kewpie mayofor serving
Method
Step 1: Prep & marinate the chicken
To start, cut across the length of the chicken thighs, into roughly 1.5 inches (40mm) strips. You should get 3-4 pieces per chicken thigh. Set aside.
Get out a large mixing bowl and grate in the garlic cloves and knob of ginger. Crack in the egg and whisk together. Set the bowl over a scale and add the chicken pieces, starch, sake, soy sauce, sugar, and salt.
Mix the marinade and chicken together until coated. Place a lid over the bowl and for at least 15 minutes or overnight.
Step 2: Dredge the chicken pieces
Add the potato or cornstarch and flour to a large tray or bowl. Remove the chicken pieces one by one from the marinade and toss them with the starch to evenly coat each piece, no need to shake off the extra cornstarch. You can just keep all of the coated chicken in the bowl until you’re ready to fry.
Set up the fry station with the coated chicken on one side of the stove, and a wire rack over a baking sheet on the other.
Step 3: Preheat the frying oil & make the sauce
When ready to fry, place a wok or Dutch oven over medium heat and add enough peanut oil to go about 2 inches up the side of the pan. Using a thermometer, bring the oil to 350°F/176°C. While that heats up, make the sauce. Slice the scallions and grate the ginger into a bowl. Set the bowl over a scale and add all remaining sauce ingredients (the kewpie mayo and the lemon wedges are not for the sauce, those are for serving).
Step 4: First fry
Once the oil is at 350°F/176°C., working in batches, gently lower the chicken pieces into the hot oil for the first fry.
Keep the chicken moving with a slotted spoon or straining and until just lightly golden brown, about 2-3 minutes. It will not be fully cooked but set the chicken on the wire rack to let drain and rest.
Meanwhile, add the next batch of raw breaded chicken from the tray and repeat until all the batches have been fried once.
Step 5: Second fry & serve
Skim the oil for loose starch before adding the chicken in batches for a second .
This time, cook the chicken pieces until they are a deeper golden brown and crispy all over, another 2-3 minutes.
If you want the pieces super crispy, optionally pass through the oil for another 45 seconds for a third fry.
To serve, add the fried chicken to a platter with the dipping sauce, Japanese kewpie mayo, and a couple of lemon slices. Enjoy.
“Japanese fried chicken uses potato starch in the breading, and then a double or triple fry for an extra crispy crust.”
Ethan ChlebowskiWatch & Cook
Nutritional Information
Show macros split into…
Recommended: 6 servings
FAQ
Can I use cornstarch instead of potato starch?
If you don’t have potato starch, you can substitute cornstarch, although it won’t be quite as .
Potato starch is especially absorbent, making it more resistant to getting soggy and ensuring the breading will stay crispy for much longer than breading made with just flour and/or cornstarch. Potato starch doesn’t brown very well, however.
The recipe still includes some flour in the breading so that the crust still becomes an appealing golden brown.
Why the double fry?
Removing and resting the chicken after the first fry allows moisture inside the nugget to come to the surface, which would make the crust soggy.
The first fry also the hydrated starch crust, which sets after coming out of the oil. Subsequent rounds of frying off any moisture and set the starch crust into a more permanently crunchy texture.
Do I need to get sake and mirin?
Sake and mirin are both Japanese rice wine products (mirin is sweetened, however) that add acidity plus signature aromas to the marinade and sauce. You could make the recipe without these, but the flavor won’t be reminiscent of Japanese karaage. If you want to get only one of the two, get mirin, which is accessible as a cooking ingredient in most grocery stores, cheaper, and shelf stable. Sake would be found in the wine sections or in a liquor store. Mirin is used in the sauce. It could also stand in for the sake in the marinade (just omit half the amount of sugar since mirin is already sweet).
What is kewpie mayo?
Kewpie Mayonnaise is a Japanese product recently popularized by social media. What makes it different from standard mayo? 1) It’s made with more egg yolks for richness and umami-boosting ingredients (yeast extract, msg) add a signature savoriness. 2) Its glossy, thicker texture eats more like an aioli than a mayo. It’s good enough to dip fries or roasted sweet potatoes right into. 3) The packaging is delightful and satisfying to use. Its soft squeeze bottle and star-tip applicator make for easy dispensing. In the past, you had to track these down at specialty stores or international grocers. Nowadays, you can easily find the stuff in larger supermarkets or even online.